How to Customize Validation Messages
About Custom Error Messages
Validation messages provide users with feedback when their answers do not meet certain form requirements. These messages help ensure accurate data collection and enhance user experience by clearly indicating what needs to be corrected and how. While some validation messages can be modified using the no-code Survey Creator UI, others require a developer's input. This guide covers validation messages that can be customized in the Property Grid.
You can make any element of your survey required—from a page or panel to individual questions and matrix cells. Elements can be made required unconditionally or based on specified rules. All required survey elements are marked with an asterisk symbol by default.
Change the Required Symbol
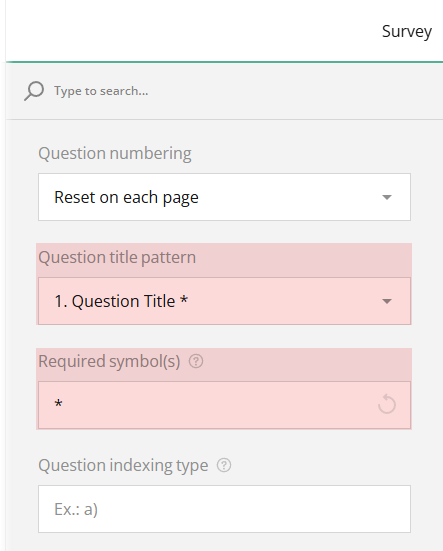
Survey Creator enables you to customize the default asterisk symbol by following these steps:
- In the top-right corner of the Property Grid, select Survey to switch to the survey-level settings.
- Under the Question Settings category, locate the Required symbol(s) property and enter a custom value to indicate required questions.
Additionally, you can change the position of the symbol in the question title using the Question title pattern setting. By default, the symbol appears at the end of the title.
Change the Location of Error Messages
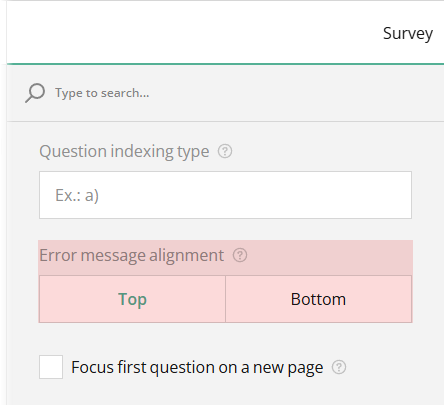
By default, validation messages appear at the top of the question box. To change their location, do the following:
- In the Property Grid, select Survey to access the survey-level settings.
- Under the Question Settings category, locate the Error message alignment property.
- Set the property to Bottom to move error messages below the question box.
Customize Error Messages for Required Questions
Make a Question Required
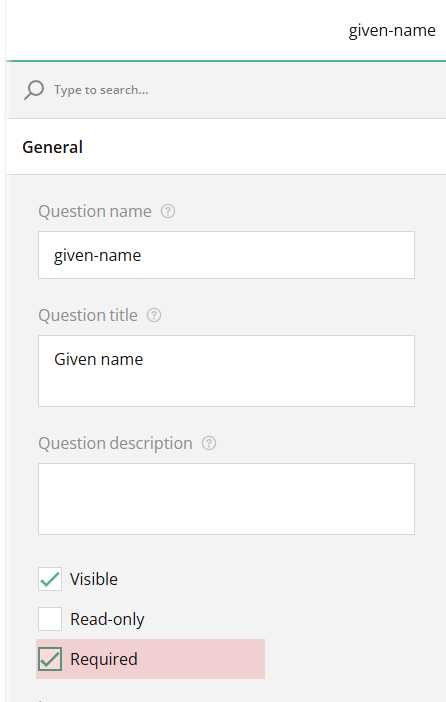
Questions can be made required unconditionally by selecting the Required property under the General category.
Make a Question Conditionally Required
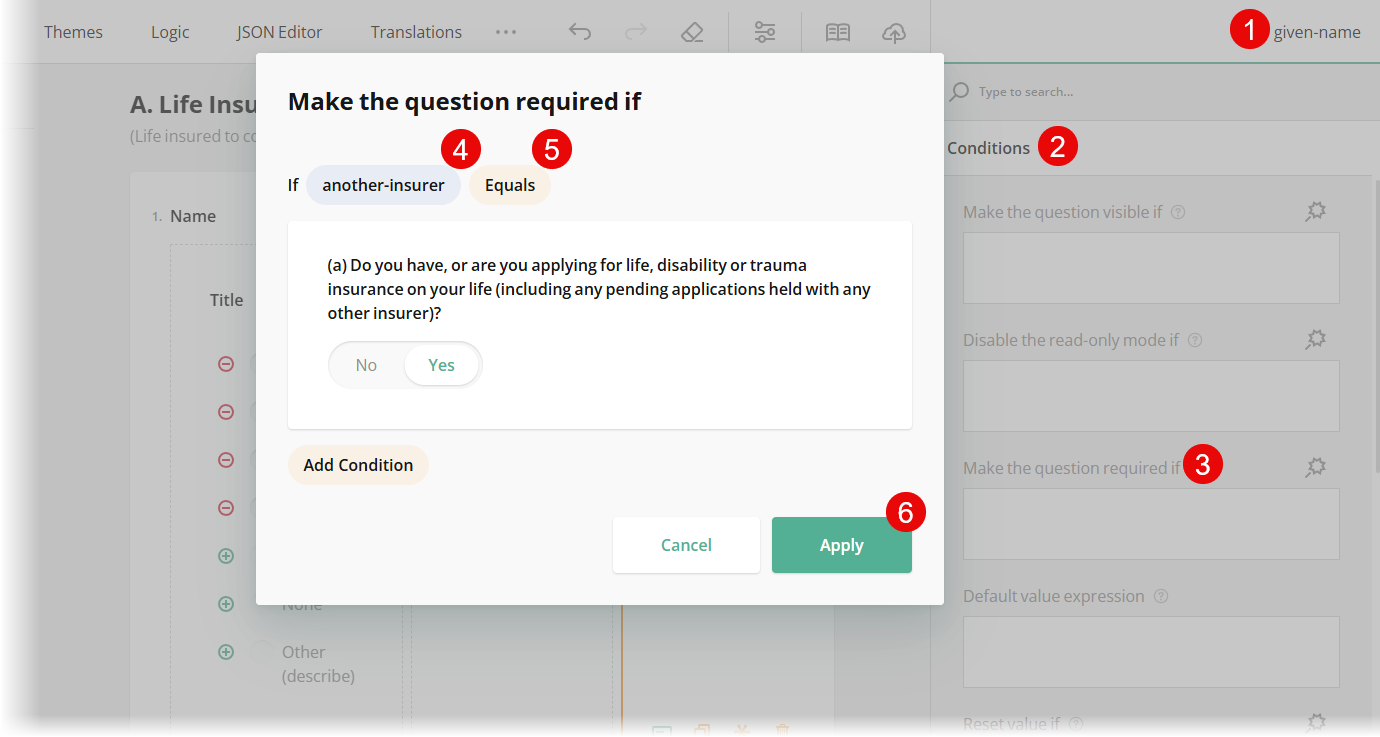
Alternatively, you can make a question required conditionally by following these steps:
- Select the question you want to make conditionally required.
- Under the Conditions category, locate the Make the question required if property.
- Click the Magic wand icon to open a popup for condition configuration.
- In the popup, select the triggering element's ID (its Question name property value).
- Choose a condition from the drop-down menu, such as Empty, Not empty, Equals, or Greater than.
- Enter or select the triggering value.
- Click Apply.
If the condition is met and a respondent attempts to skip the question without giving an answer, they will see an error message.
Specify a Custom Message for Required Question
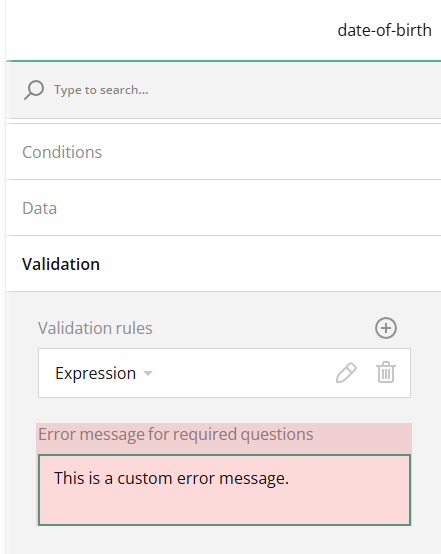
The default error message for required questions is "Response required." To customize this message for a specific question, follow the steps below:
- Select the question you want to customize.
- Under the Validation category, locate the Error message for required questions setting.
- Enter a new error message in the input field.
Customize Error Messages for Min/Max Value Validation
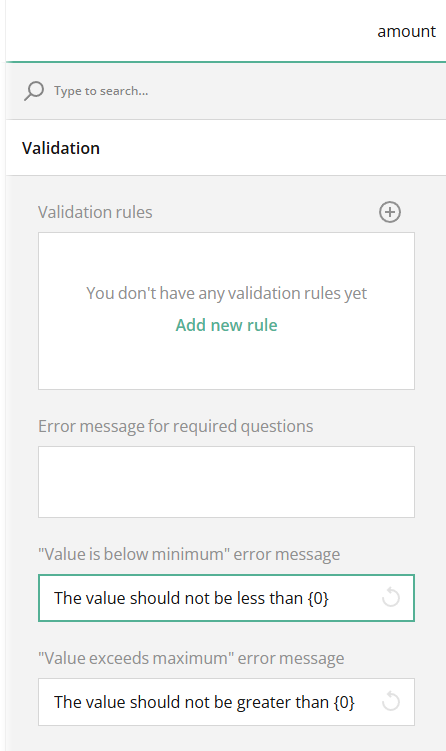
Date and numeric Single-Line Input questions allow you to set minimum and maximum values for validation. Before a respondent inputs a value, the UI provides visual cues. For instance, a date input disables dates outside the valid range. To provide textual feedback after validation has occurred, you can display custom error messages for minimum and maximum values, as described below:
Add a Single-Line Input question to your survey.
Under the General category, locate the Input type property and set it to Number.
Set Min and Max values using the dedicated input fields.

Under the Validation category, locate the "Value is below minimum" error message property.
Replace the default message ("The value should not be less than {0}") with your custom text.
Ensure you retain the
{0}placeholder, which dynamically reflects the minimum value.Repeat the same steps for the "Value exceeds maximum" error message property.
Add a Custom Validation Rule
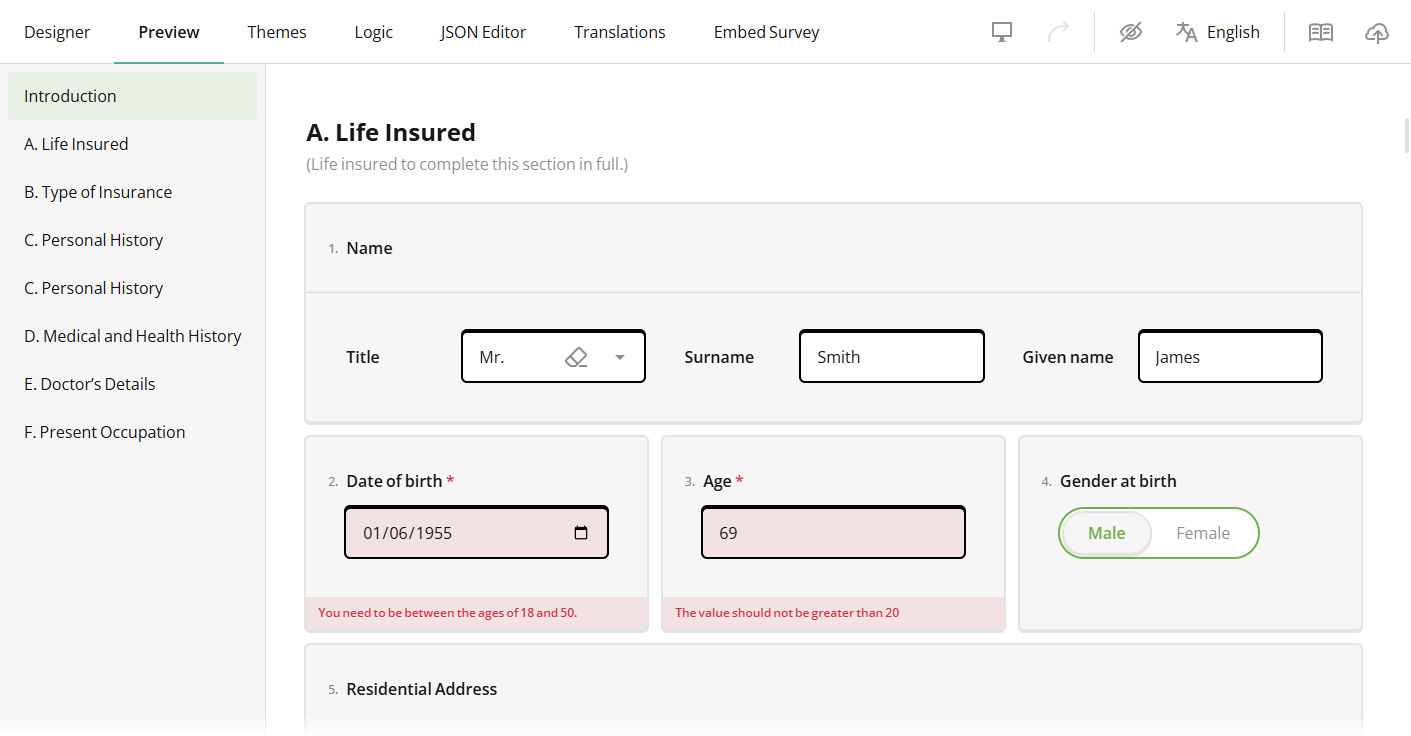
Besides checking if a required question has an answer, you can also create a custom validation rule with a custom error message. The example below shows how to add a custom validation rule for a Single-Line Input question of a Date input type that asks respondents to provide their date of birth. Instead of setting a date range using the Min and Max values, the question uses the age() function to calculate the age of a respondent based on their birthdate. If the age is outside the 18-50 range, the question throws a corresponding error message.
To add a custom validation rule for a Date of Birth question, follow these steps:
- Add a Single-Line Input question to your survey.
- Under the General category, set the Input type property to Date.
- Under Validation category, locate the Validation rules property.
- Click the Plus icon to add a new validation rule.
- Enter a custom error message to be shown if a user provides an invalid answer, e.g., "You need to be between the ages of 18 and 50."
- Enter the expression
age({date-of-birth}) >= 18 and age({date-of-birth}) <= 50.
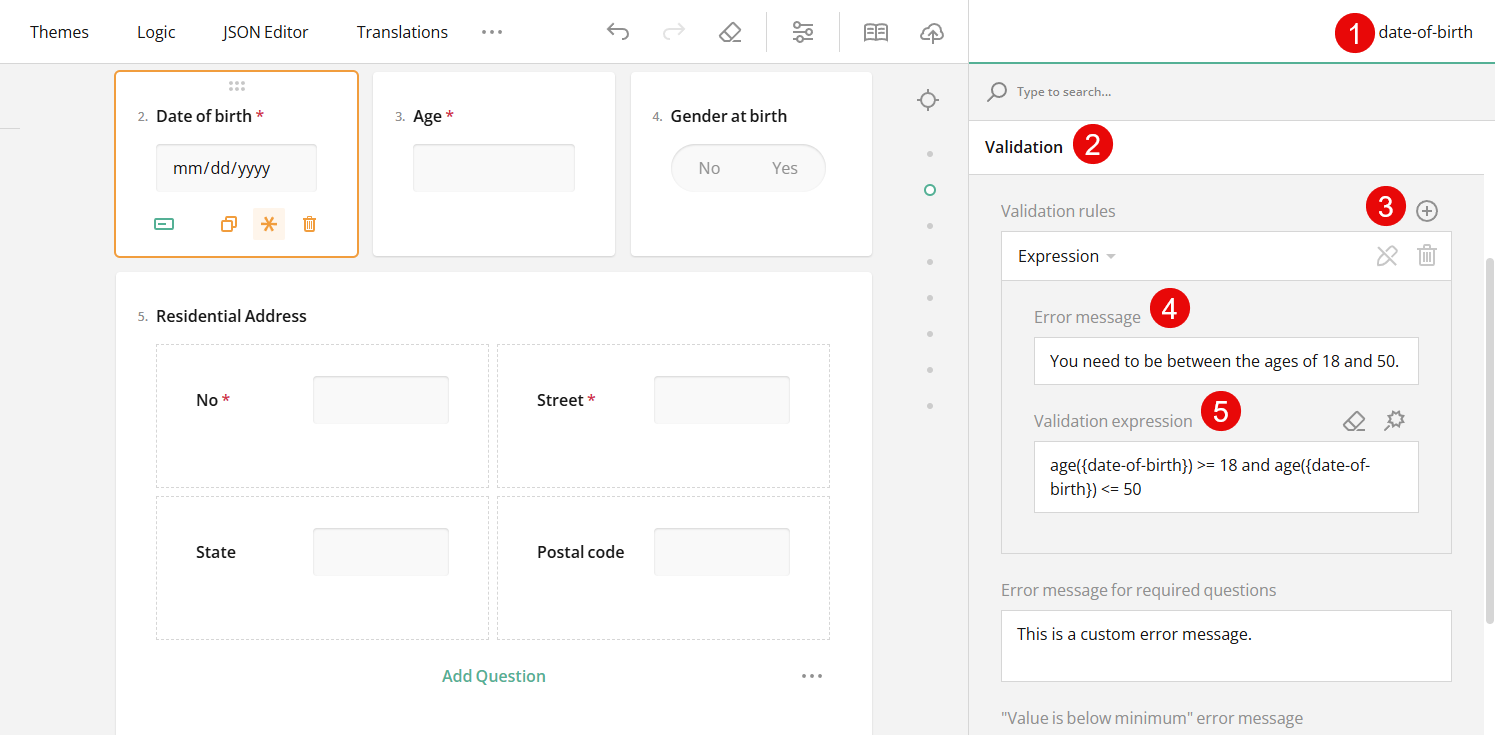
In this example, the expression checks if the user's age is within the required range. However, you can build any other validation rule using the expression syntax supported in Survey Creator.
Customize Error Messages for Required Panels
The default error message for required panels is "Response required: answer at least one question." To customize this message for a specific panel:
Select the panel you want to customize.
Under the Validation category, locate the Error message for required questions setting.
Enter a new error message in the input field.
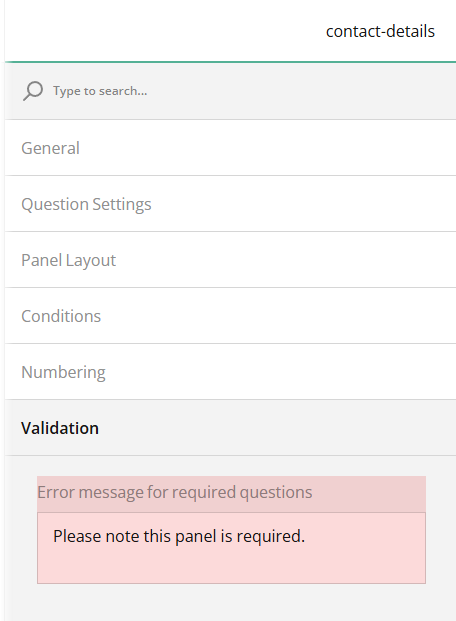
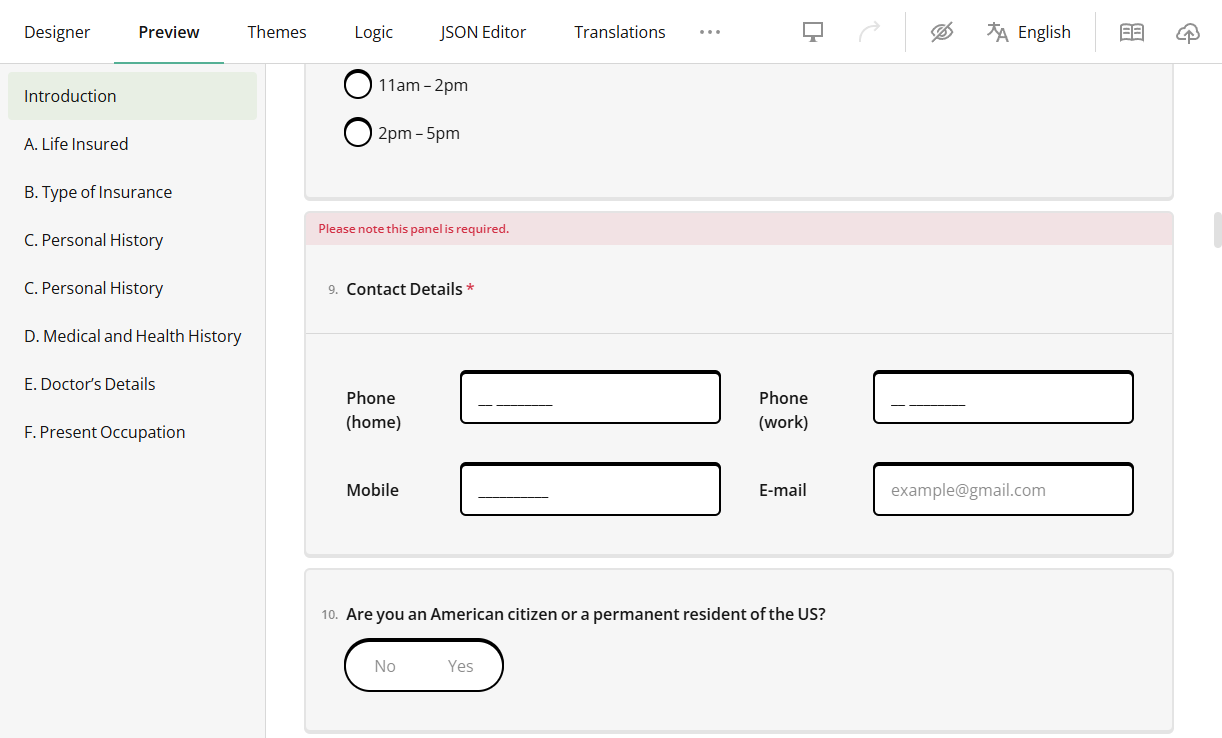
Switch to the Preview tab to test the new validation message.
Customize Error Messages for Required Pages
You can prevent users from skipping a specific page by making it required. A required page ensures that respondents provide an answer to at least one question on it.
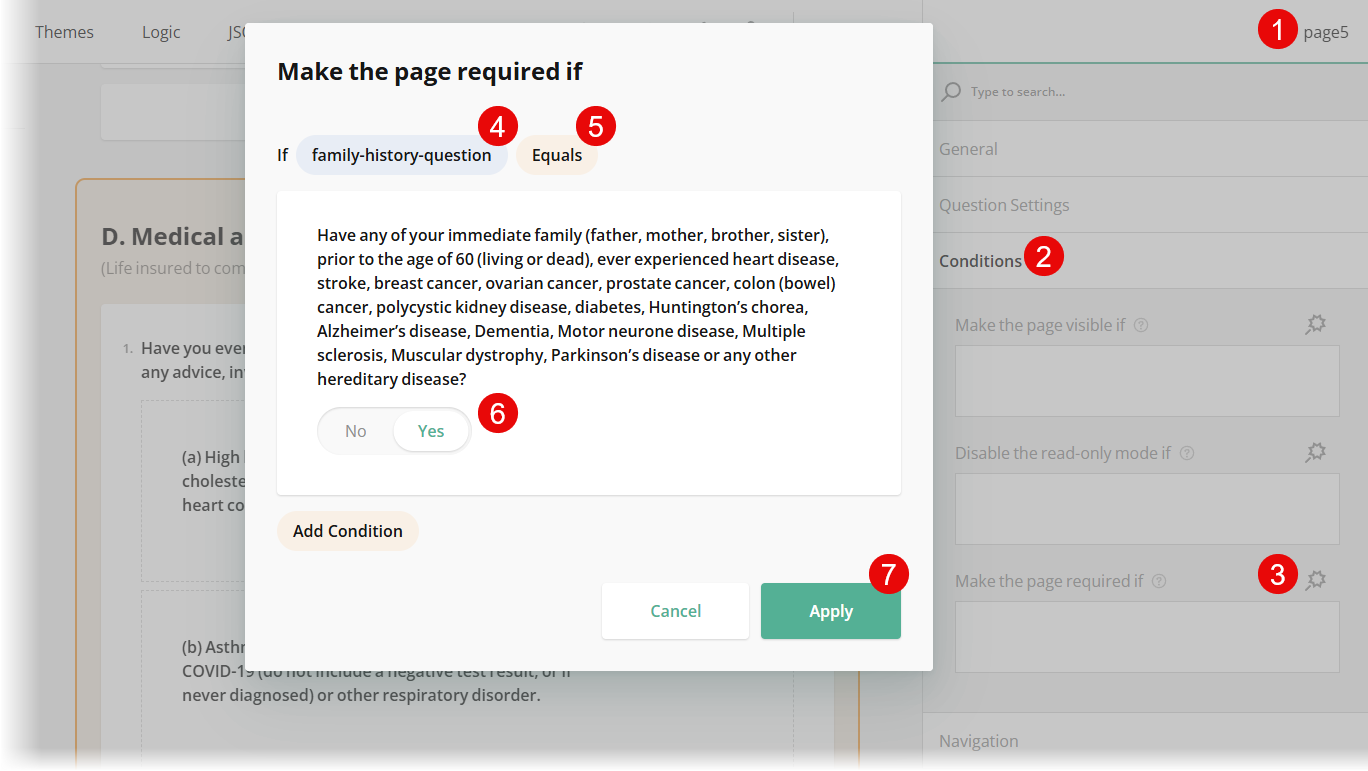
A page cannot be made required unless you specify a condition which will make it one when evaluated to true. To make a page of your survey conditionally required, follow these steps:
- Select the page you want to make required.
- Under the Conditions category, locate the Make the page required if property.
- Click the Magic wand icon to open a popup for condition configuration.
- In the popup, select the triggering element's ID (its Question name property value).
- Choose a condition from the drop-down menu, such as Empty, Not empty, Equals, or Greater than.
- Enter or select the triggering value.
- Click Apply.
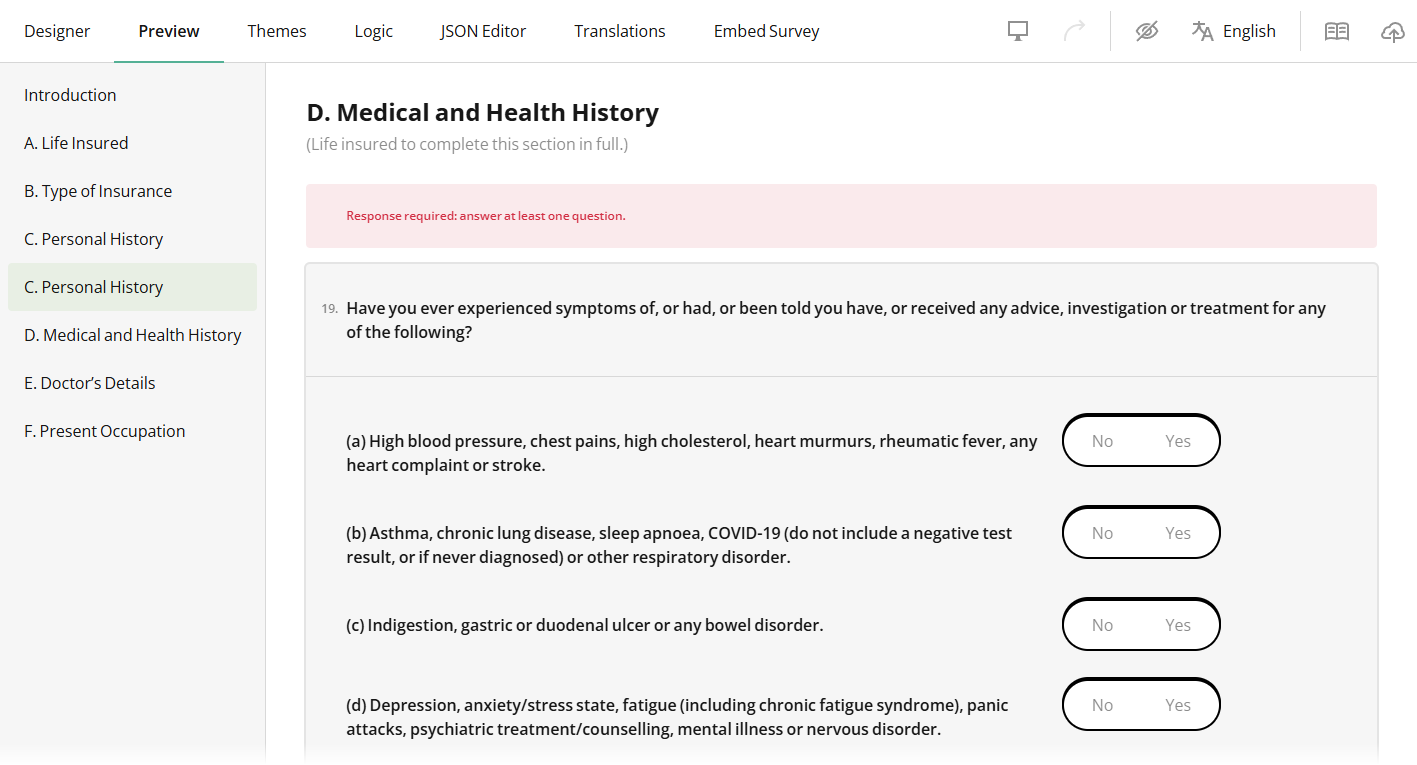
If the condition is met, and a respondent attempts to skip the page without answering at least one question, they will see an error message "Response required: answer at least one question.". This message can only be modified by a developer.
Enable Immediate Validation
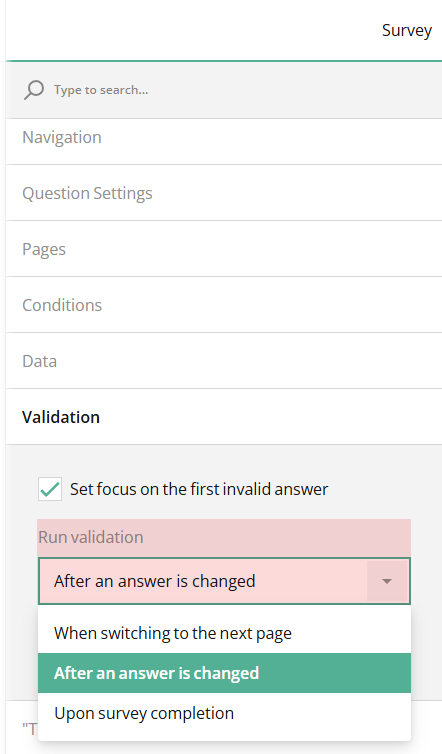
By default, validation occurs when a user proceeds to the next page. If you want validation to happen immediately, follow these steps:
- In the top-right corner of the Property Grid, select Survey to access survey-level settings.
- Under the Validation category, locate the Run validation property.
- Select After an answer is changed to run validation immediately after a respondent updates an answer.
Send feedback to the SurveyJS team
Need help? Visit our support page